To do
To prepare for this course, the following tasks need to be carried out:
- Installation of Visual Studio Code (VSCode)
- Link VSCode to
taz.cs.wcupa.edu.- Setup GitHub account
Installation of VSCode
- Go to VSCode’s download page and download the correct package for your computer (Windows, Mac OS, or Linux).
- For Windows, you can download
User Installer 64-bitversion if you only want to install VSCode into your user account.
Link VSCode to taz.cs.wcupa.edu
- Launch VSCode.
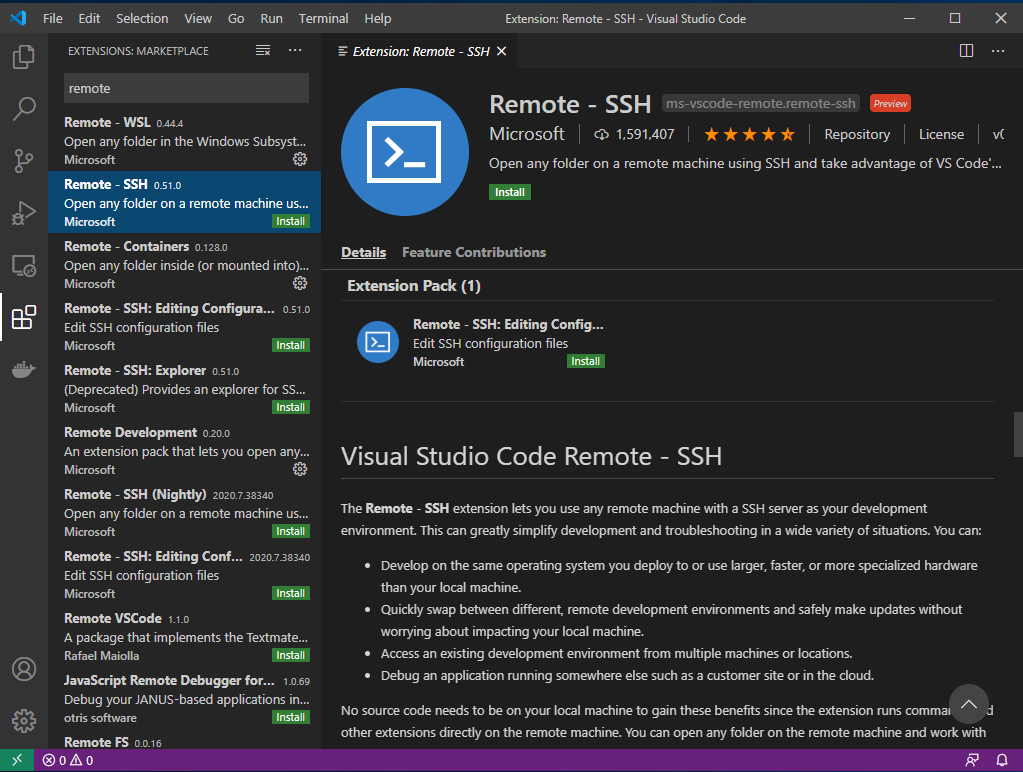
- On the left bar, select the
Extensionbutton (the button with blocks).

- Type remote in the search box.
- Select the Remote - SSH, then click
Install.
- Once the installation finish, click on the bottom left green button. If you mouse over the button, it shows Open a remote windows.
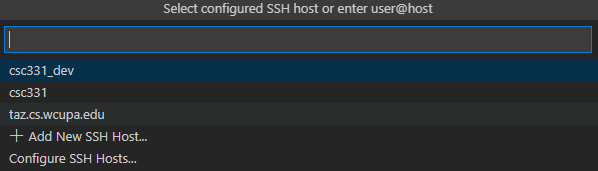
- Select Remote-SSH: Connect to Host….
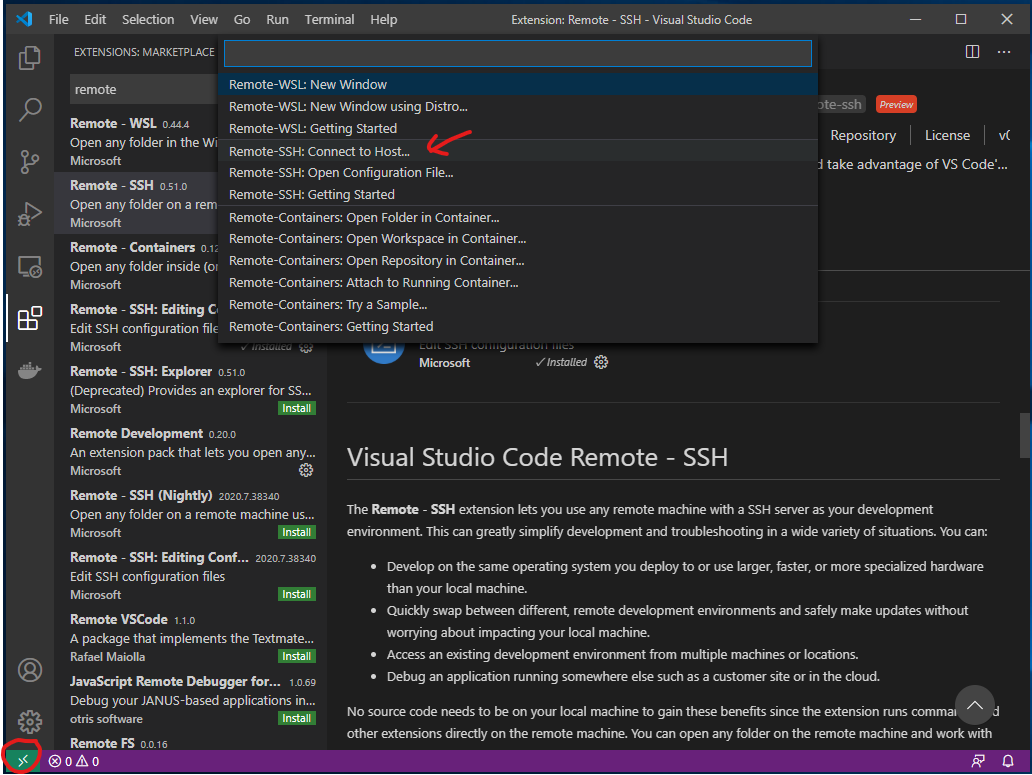
- Select Add New SSH Host…
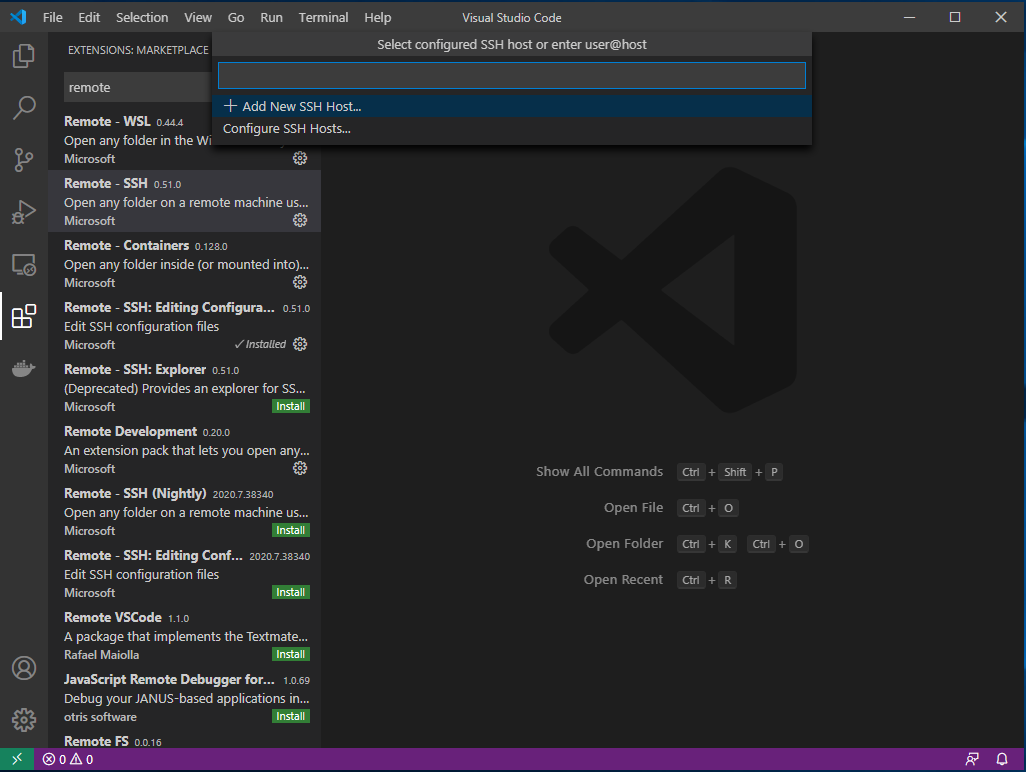
- Enter the following into the Enter SSH Connection Command box:
- Remember to replace USERNAME with your
tazaccount name.
ssh USERNAME@taz.cs.wcupa.edu

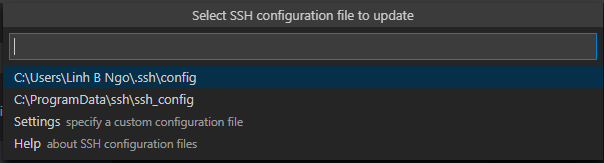
- Select the top option for the SSH configuration file to update.
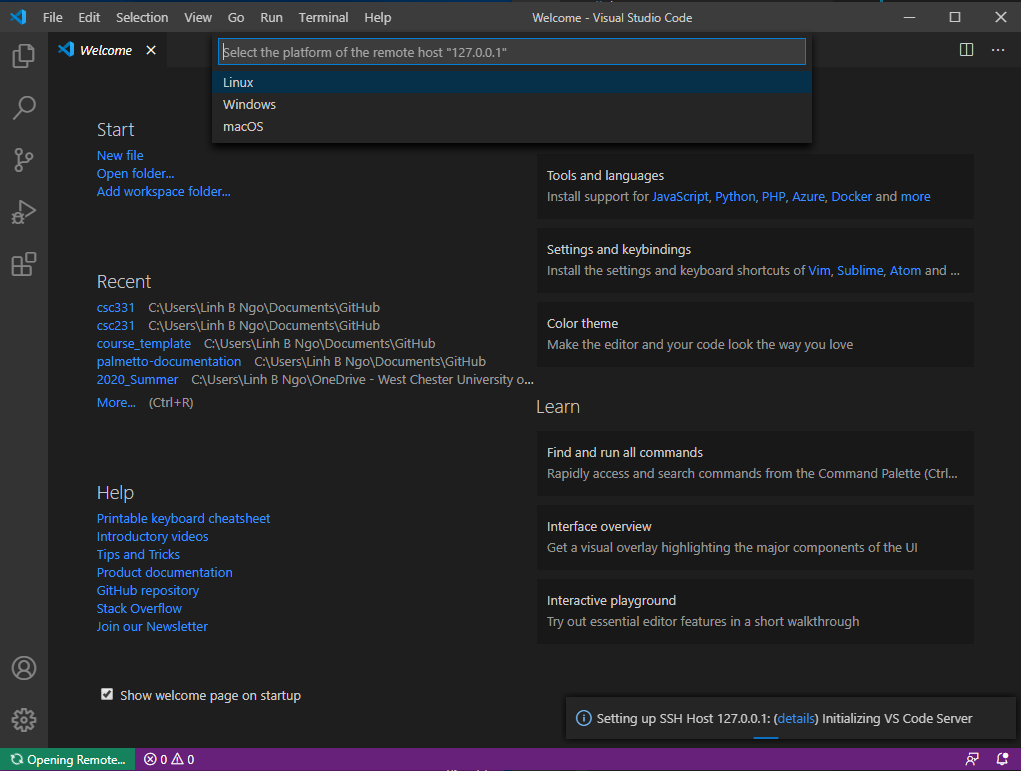
- Next, repeat the step where you clicked the Open a remote windows option.
- This time, the
taz.cs.wcupa.eduhost will show up. - Click on this host.
- Select
Linuxas the platform fortaz.cs.wcupa.edu.
- Enter the password for your
tazaccount.

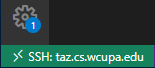
- You should see the bottom left green bar now show the
taz.cs.wcupa.educonnection.
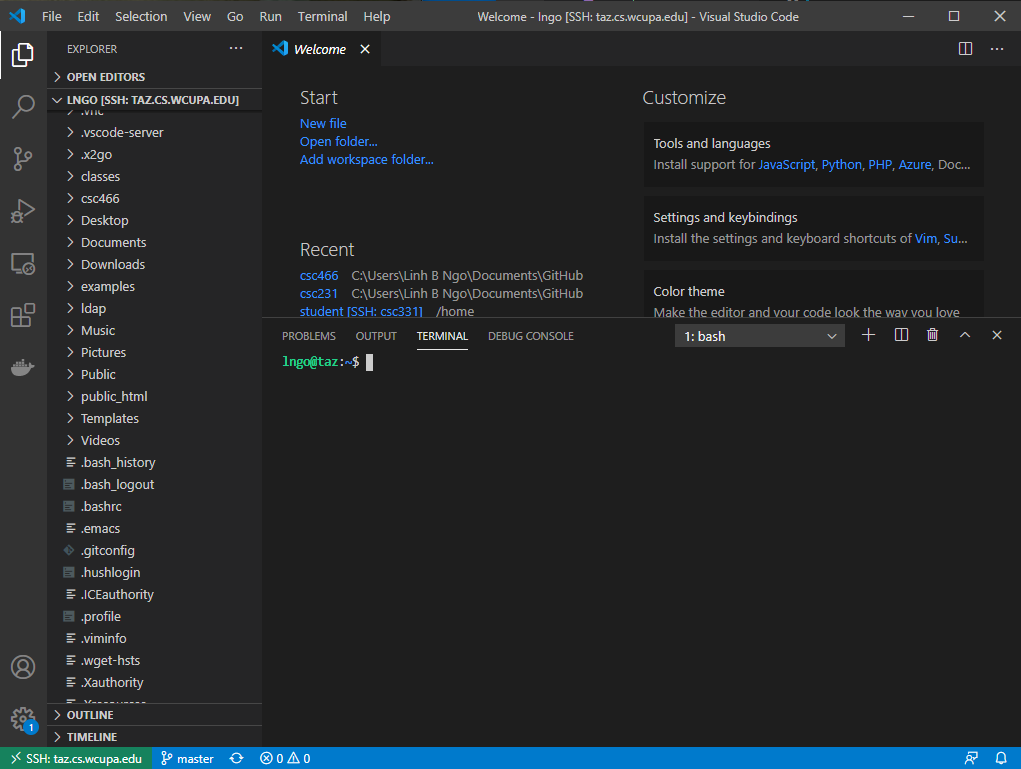
- Click the top left Explorer button.
- Click
OK, as we want to open and view the files in/home/YOUR_USER_NAME. - You will be asked to enter the password again.
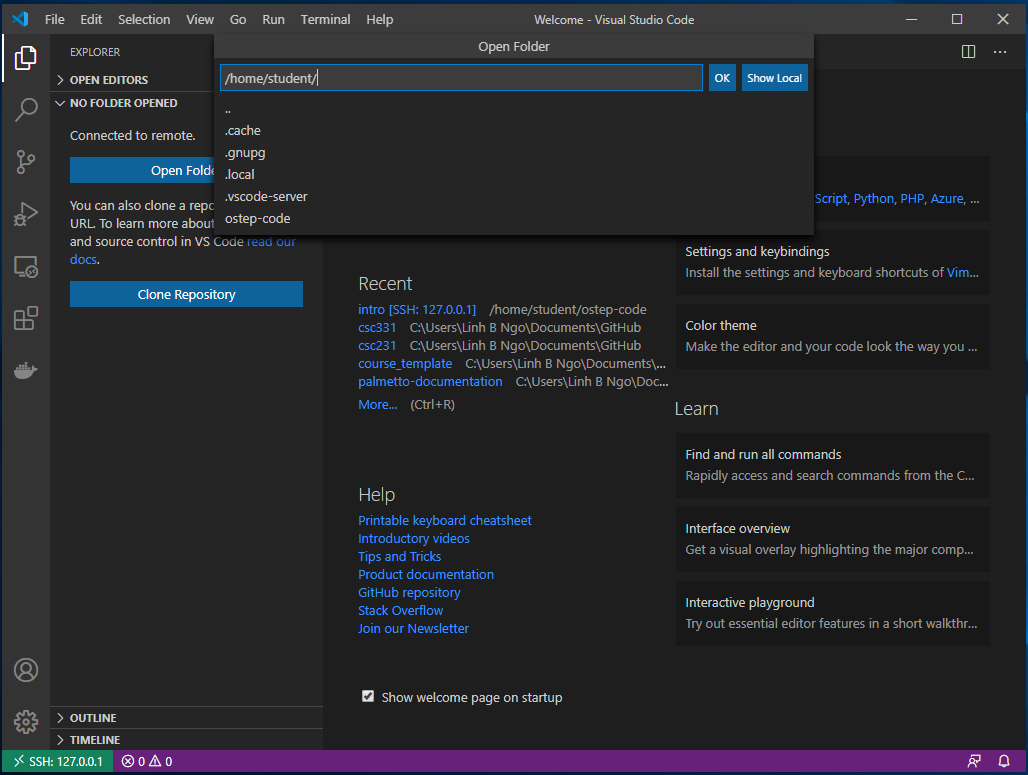
- You will see the files and directories in
/home/YOUR_USER_NAMEin the left windows. - Click
Terminaland selectNew Terminal. - A
bashshell into the VM will be opened.
Setup GitHub account
- If you don’t already have a GitHub account, go to [GitHub web page][github] to sign up for an account.
- It should be noted that you can link multiple email addresses to a GitHub account. Even if you already have a GitHub account, you might want to link the account to your WCUPA email.
Setup an XSEDE account
- Visit XSEDE Portal page to create an account on XSEDE.
- Watch out in case the confirmation email will go into WCUPA’ spam folder. You can visit [https://wcupa.login-us.mimecast.com/], click on the
...side tab, thenPersonal On Holdto see if the confirmation email is there. - Once you finished registering, go to the following Google Form to fill out information about your XSEDE account. It is important that you give me your XSEDE account, which is the
USER NAMEthat you use to login to XSEDE portal.
