Introduction to CloudLab
Overview
Teaching: 0 min
Exercises: 0 minQuestions
1. What is CloudLab
- Experimental testbed for future computing research
- Allow researchers control to the bare metal
- Diverse, distributed resources at large scale
- Allow repeatable and scientific design of experiments
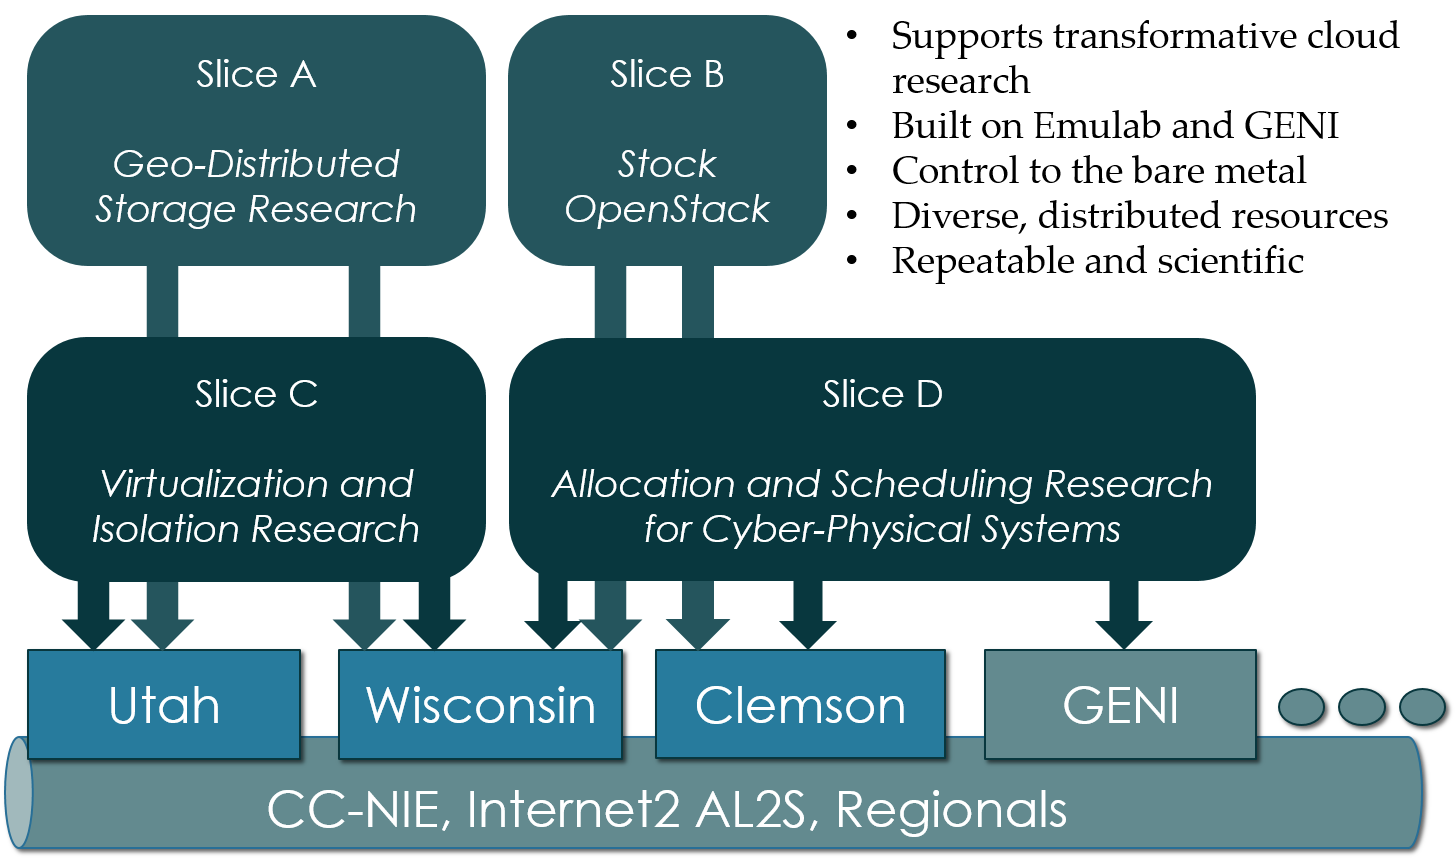
2. What is GENI
- Global Environment for Networking Innovation
- Combining heterogeneous resource types, each virtualized along one or more suitable dimensions, to produce a single platform for network science researchers”
- Key components:
- GENI racks: virtualized computation and storage resources
- Software-defined networks (SDNs): virtualized, programmable network resources
- WiMAX: virtualized cellular wireless communication
Berman, M., Chase, J.S., Landweber, L., Nakao, A., Ott, M., Raychaudhuri, D., Ricci, R. , and Seskar, I., 2014. GENI: A federated testbed for innovative network experiments. Computer Networks, 61, pp.5-23.
3. Key experimental concepts
- Sliceability: the ability to support virtualization while maintaining some degree of isolation for simultaneous experiments
- Deep programmability: the ability to influence the behavior of computing, storage, routing, and forwarding components deep inside the network, not just at or near the network edge.
4. Hardware
- Utah/HP: Low-power ARM64 (785 nodes)
- 315 m400: 1X 8-core ARMv8 at 2.4GHz, 64GB RAM, 120GB flash
- 270 m510: 1X 8-core Intel Xeon D-1548 at 2.0 GHz, 64GB RAM, 256 GB flash
- 200 xl170: 1X 10-core Intel E5-2640v4 at 2.4 Ghz, 64 GB RAM, 480 GB SSD
- Wisconsin/Cisco: 530 nodes
- 90 c220g1: 2X 8-core Intel Haswell at 2.4GHz, 128GB RAM, 1X 480GB SDD, 2X 1.2TB HDD
- 10 c240g1: 2X 8-core Intel Haswell at 2.4GHz, 128GB RAM, 1X 480GB SDD, 1X 1TB HDD, 12X 3TB HDD
- 163 c220g2: 2X 10-core Intel Haswell at 2.6GHz, 160GB RAM, 1X 480GB SDD, 2X 1.2TB HDD
- 7 c240g2: 2X Intel Haswell 10-core at 2.6GHz, 160GB RAM, 2X 480GB SDD, 12X 3TB HDD
- 224 c220g5: 2X 10-core Intel Skylake at 2.20GHz, 192GB RAM, 1TB HDD
- 32 c240g5: 2X 10-core Intel Skylake at 2.20GHz, 192GB RAM, 1TB HDD, 1 NVIDIA P100 GPU
- 4 c4130: 2X 8-core Intel Broadwell at 3.20GHz, 128GB RAM, 2X 960GB HDD, 4 NVIDIA V100 GPU
- Clemson/Dell: 256 nodes
- 96 c8220: 2X 10-core Intel Ivy Bridge at 2.2GHz, 256GB RAM, 2X 1TB HDD
- 4 c8220x: 2X 10-core Intel Ivy Bridge at 2.2GHz, 256GB RAM, 8X 1TB HDD, 12X 4TB HDD
- 84 c6420: 2X 14-core Intel Haswell at 2.0GHz, 256GB RAM, 2X 1TB HDD
- 2 c4130: 2X 12-core Intel Haswell at 2.5GHz, 256GB RAM, 2X 1TB HDD, 2 NVIDIA K40m GPU
- 2 dss7500: 2X 6-core Intel Haswell at 2.4GHZ, 128GN RAM, 2X 126GB SSD, 45X 6TB HDD
- 72 c6420: 2X 16-core Intel Skylake at 2.6GHZ, 386GB RAM, 2X 1TB HDD
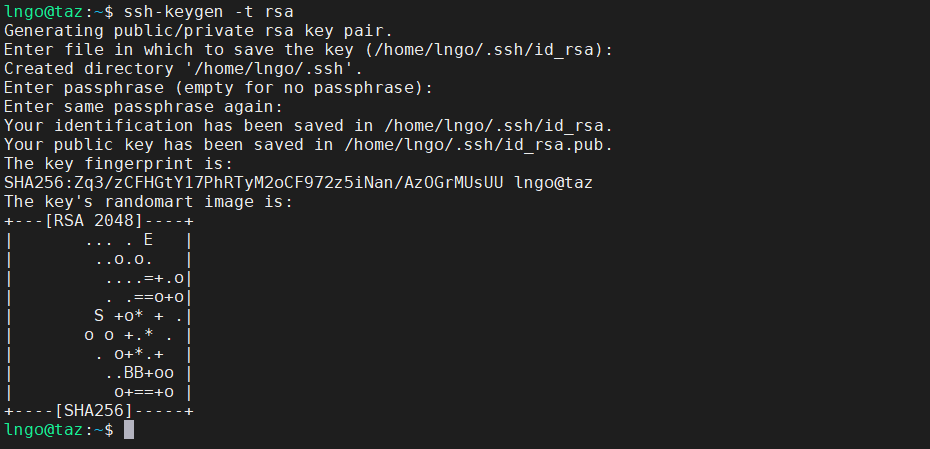
5. Setup SSH
- SSH into
taz.cs.wcupa.eduorsubmitty.cs.wcupa.eduand run the following commands:- Hit
Enterfor all questions. Do not enter a password or change the default location of the files.$ cd $ ssh-keygen -t rsa
- Run the following command to display the public key
- Drag your mouse over to paint/copy the key (just the text, no extra spaces after the last character)
$ cat ~/.ssh/id_rsa.pub
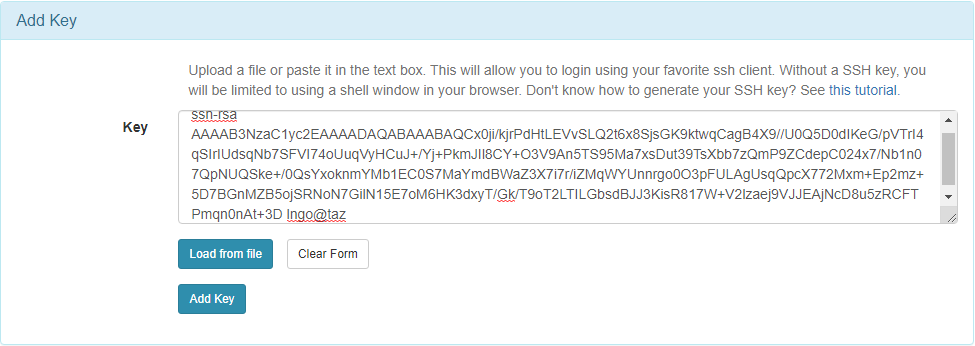
- Log into CloudLab, click on your username (top right) and select
Manage SSH Keys:
- Paste the key into the
Keybox and clickAdd Key:


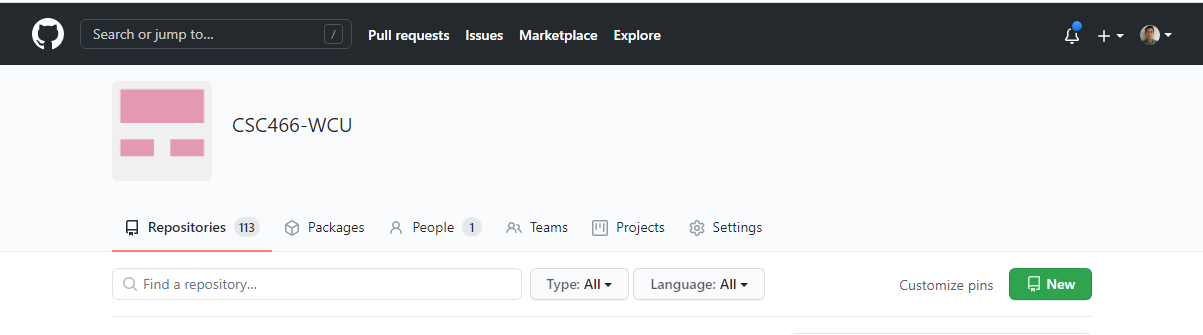
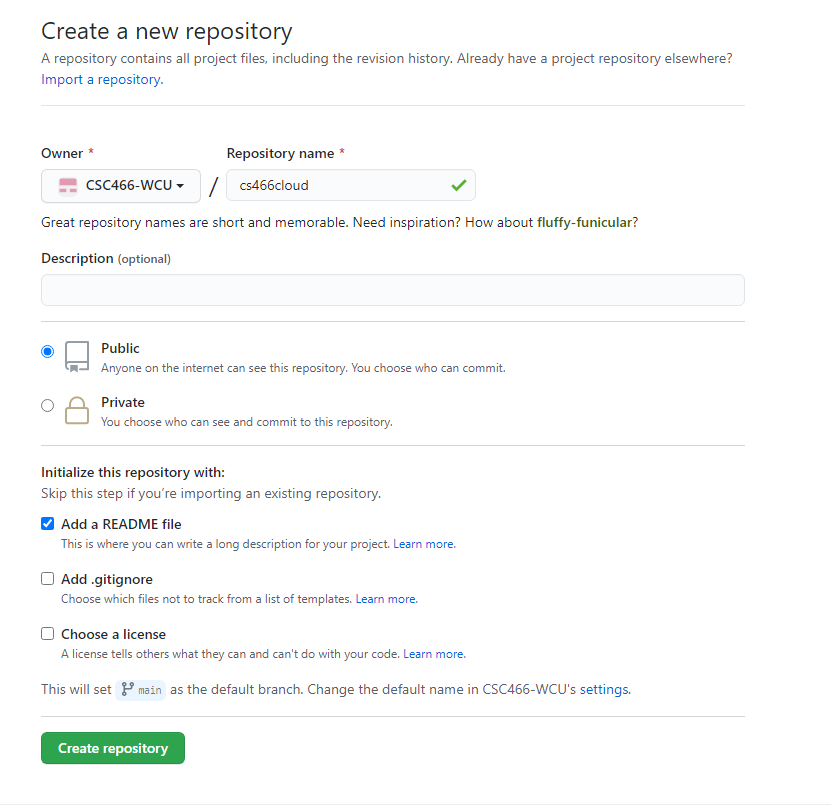
6. Setup GitHub repository
- Go to your GitHub account, under
Repositories, selectNew.
- You can select any name for your repo.
- It must be
public.- The
Add a README filebox must be checked.- Click
Create repositorywhen done.
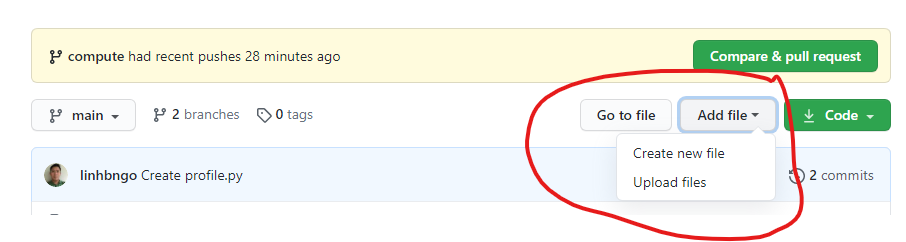
- Click
Add fileand selectCreate new file
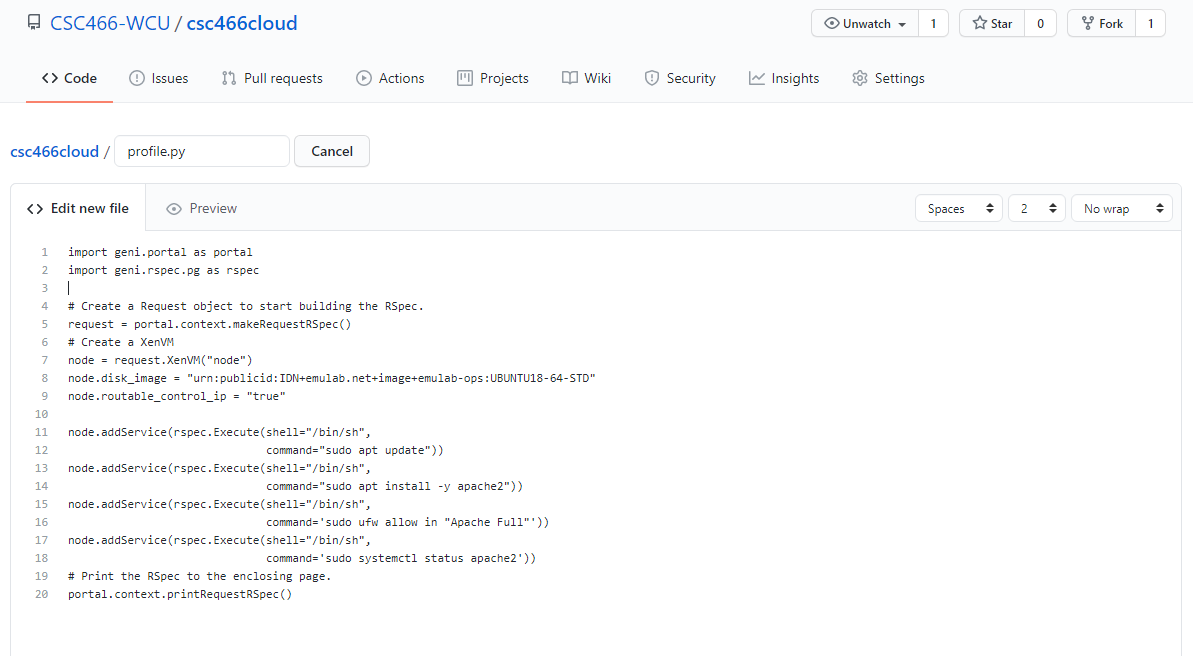
- Type
profile.pyfor the file name and enter THIS CONTENT into the text editor.- Click
Commit new filewhen done.
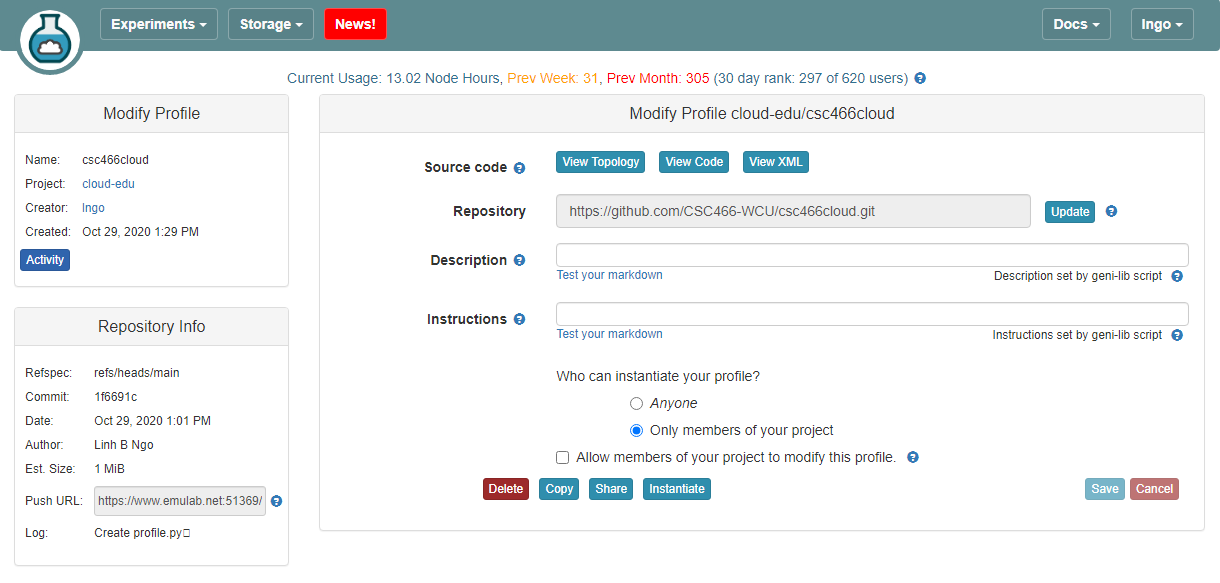
7. Setup CloudLab profile
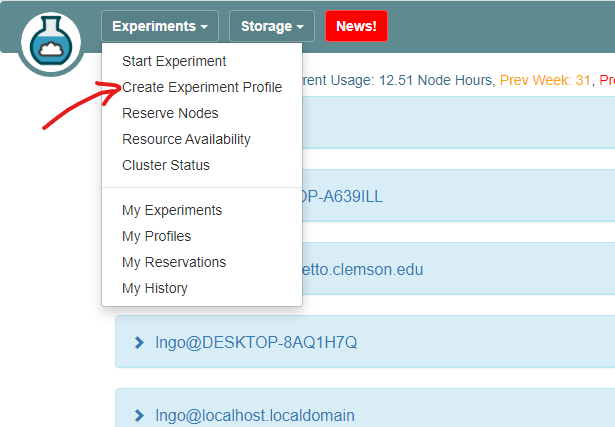
- Login to your CloudLab account, click
Experimentson top left, selectCreate Experiment Profile.
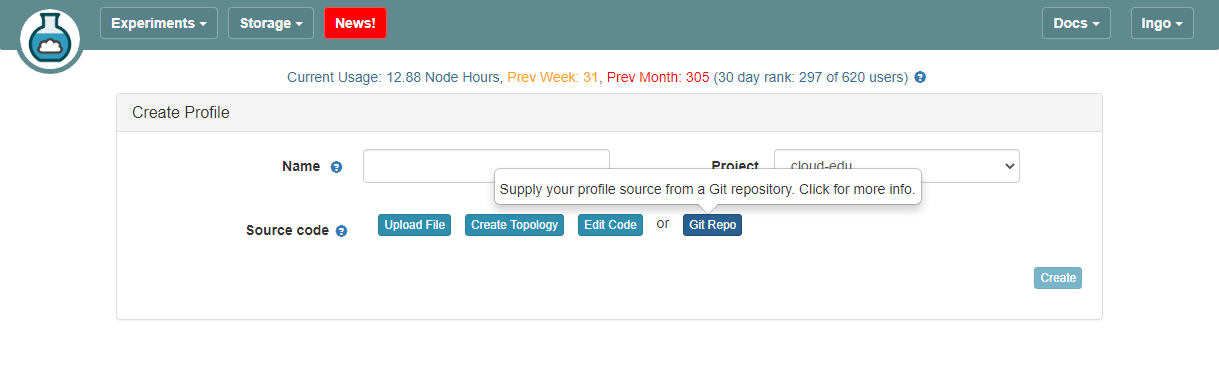
- Click on
Git Repo
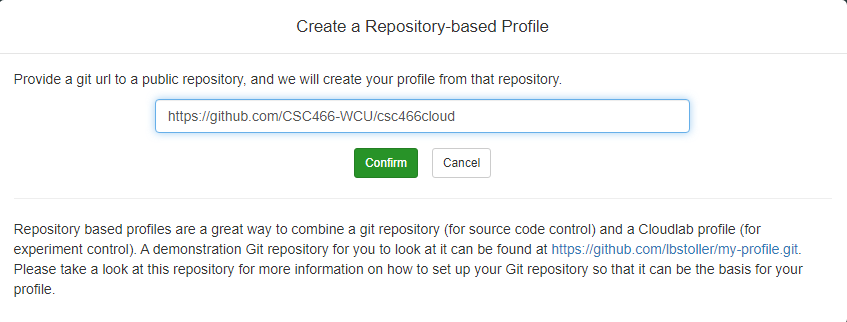
- Paste the URL of your previously created Git repo here and click
Confirm
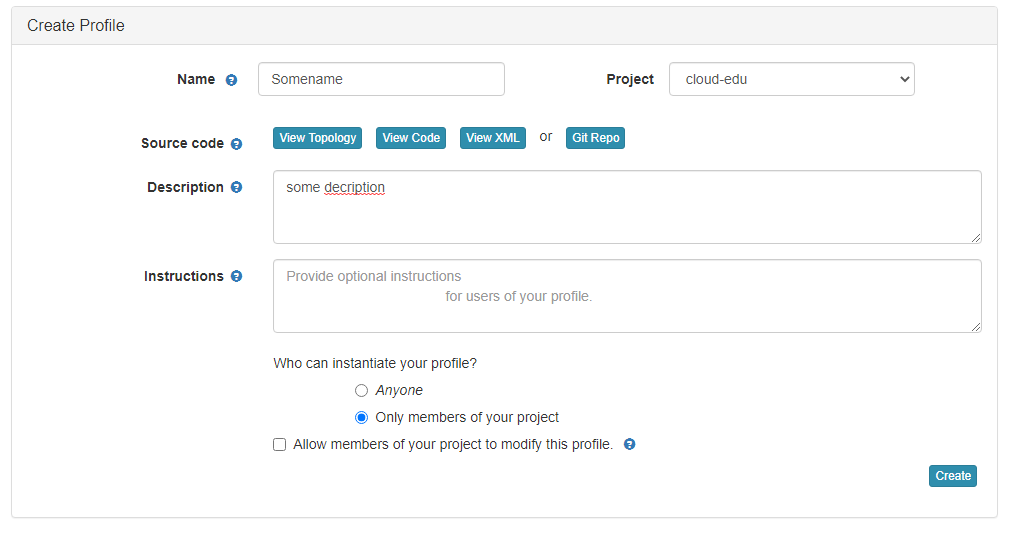
- Enter the name for your profile, put in some words for the Description.
- You will not have a drop-down list of Project.
- Click
Createwhen done.
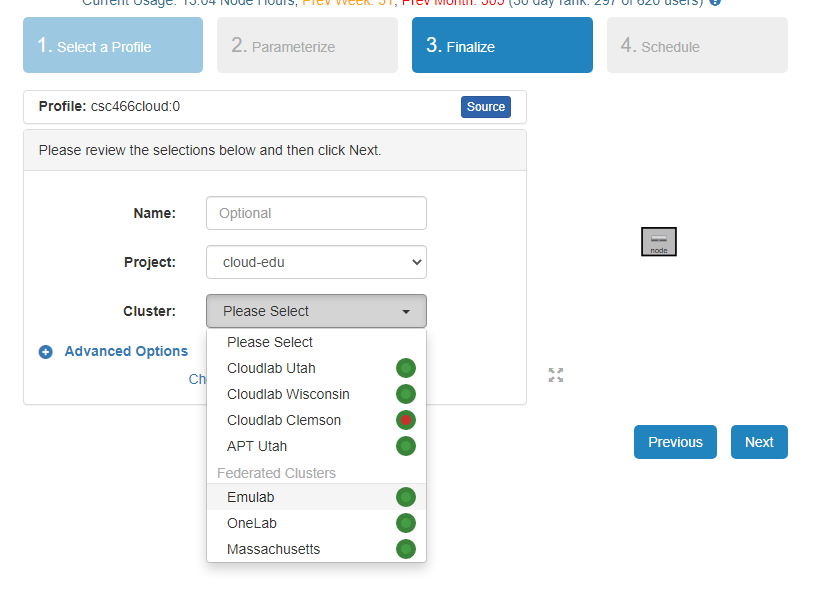
- Click
Instantiateto launch an experiment from your profile.
- Select a Cluster from Wisconsin, Clemson, or Emulab, then click
Next.- Do not do anything on the next
Start on date/timescreen. ClickFinish.
- Your experiment is now being
provision, and then `booting
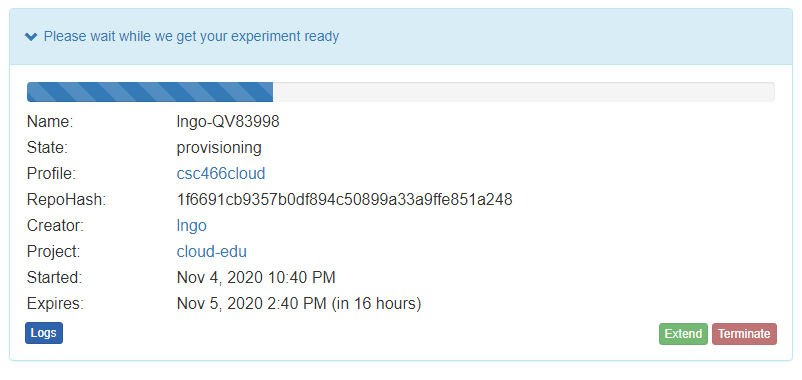
- When it is ready, you can use the provided SSH command to log in to your experiment (assuming your key was set up correctly)


Key Points