Kubernetes Application: CI/CD pipeline - Part II
Overview
Teaching: 0 min
Exercises: 0 minQuestions
Being able to deploy a Jenkins server inside Kubernetes and integrate with GitHub for automated building/testing.
1. Updated Jenkins launch
- Launch an experiment from the
csc468lngoprofile using thekubernetes-jenkins-cdcibranch.- This branch is from kubernetes-jenkins-cdci.
- Once the experiment is fully deployed, and all Startup Finished running, SSH into the head node. You don’t have to do anything else.
- The launching of the overlay network is now fully automated and is integrated into the
kube_manager.shfile.
2. Setup Jenkins
- All normal commands to launch Jenkins have been integrated into
launch_jenkins.sh.$ bash /local/repository/launch_jenkins.sh
- To get the
initialAdminPassword, you can run the following command directly:$ kubectl exec $(kubectl get pods -n jenkins | grep jenkins | awk '{print $1}') -n jenkins -- cat /var/jenkins_home/secrets/initialAdminPassword
kubectl execallows users to run a bash command directly inside the specified pod.$(kubectl get pods -n jenkins | grep jenkins | awk '{print $1}')is a sequence of pipe commands:
$(kubectl get pods -n jenkinsget all pods| grep jenkinsparses the line containing the jenkins pod names| awk '{print $1}')gets the first column, which is the pod ID only.- Configure Jenkins via the web interface as shown in slide 3 and 4 of Kubernetes Application: CI/CD pipeline - Part I.
- Add the following plugins to Jenkins:
- Kubernetes
- SSH Agent
3. Configure Jenkins
In the subsequent slides, we are revisiting the configuration of Jenkins in a more organized manner.
- Configure SSH credentials
- Configure one single executor to support remote SSH execution
- Configure Kubernetes access for deploying Jenkins container-agents.
- Configure pod- and container-templates
4. Configure Jenkins: SSH credentials
- On the CloudLab head node, run
ssh-keygen(do not enter any password when asked).- Run
cat .ssh/id_rsa.pub >> .ssh/authorized_keys- Run
cat ~/.ssh/id_rsaand copy the displayed text, including the starting and ending dashes without any extra spaces.- On Jenkins Dashboard, go to
Manage Jenkins/Manage Credentials.
- Click on
JenkinsunderStores scoped to Jenkins, thenGlobal credentials (unrestricted).- Click on
Add Credentials.- Fill in the boxes as follows:
Kind: SSH Username with private nameScope: Global (Jenkins, nodes, items, all child items, etc)ID: cloudlabUsername: Enter your CloudLab login username here.Private Key: CheckEnter directly, clickAdd, then paster the previously copied private key to this box.- Click
OK.
5. Configure Jenkins: Single executor
- On Jenkins Dashboard, go to
Manage Jenkins/Manage Nodes and Clouds.
- Click on the gear icon for
Built-In Node- Fill in the boxes as follows:
Number of executors: 1Labels: deployUsage: Only build jobs with label expressions matching this node
6. Configure Jenkins: Kubernetes
- On Jenkins Dashboard, go to
Manage Jenkins/Manage Nodes and Clouds/Configure Clouds.- Select
KubernetesfromAdd a new clouddropbox.- Click on
Kubernetes Cloud Details.- Fill in the boxes as follows:
Kubernetes Name: kubernetesKubernetes URL: Information of theKubernetes control planegotten from runningkubectl cluster-infoon the CloudLab head node.- Check
Direction Connectionbox.- Click
Test Connectionto confirm connection.
7. Configure Jenkins: Pod Templates
- Continue on the
Configure Cloudsfrom the previous slide.- Click
Add Pod TemplatethenPod Template details- Fill in the boxes as follows:
Name: agent-templateNamespace: jenkinsUsage: Only build jobs with label expressions matching this node- Do not add container yet
- Click on
Add Volume:
- Select
Host Path Volume- Enter
/var/run/docker.sockfor bothHost pathandMount path.- This is to enable the building and pushing of Docker images.
8. Configure Jenkins: Container Templates
In the scope of
Pod Template
- Click
Add Container- Fill in the boxes as follows:
Container Template Name: golangDocker image: golang- Click
Add Container
Container Template Name: dockerDocker image: docker- Click
Add Environment Variablefor thedockercontainer template
- Prior to this, go to
hub.docker.comand login to your Docker Hub account.
- Go to Account Settings
- Go to
Security.- Click on
New Access Token.- Enter a short description for this token, allow
Access permissionto beRead, Write, Delete, and then clickGenerate.- Store this key some where safe.
- First environment variable:
Key: DOCKER_TOKENValue: the access token copied from before.- Second environment variable:
Key: DOCKER_REGISTRYValue: YOUR_DOCKERHUB_USERNAME/go_server- Third environment variable:
Key: DOCKER_USERValue: YOUR_DOCKERHUB_USERNAME- Click
Applyand thenSave.
9. Setup the app
- Create a branch called
go_appon yourhellorepository (from the hands-on in the Jenkins’ eposide).- The
go_appbranch should have the same contents as https://github.com/CSC468-WCU/hello/tree/go_app- Setup the
webhookfor thego_appto point to the Jenkins server in the previous slide.- The composition of the files in this branch is:
main.go: The Go file that serves as the web server (the application to be deployed).main_test.go: The Go file that serves as the test file (part of the CD process).Jenkinsfile: Setup the pipeline for Jenkins to build, test, and push and deploy (if test is passed) the Go app.
- Edit the
registry(line 4) to change toYOUR_DOCKERHUB_USERNAME/go_server.- Edit the
registry(line 5) to change toYOUR_DOCKERHUB_USERNAME.- Edit the
registry(line 73, 74, 75):
- Change my username
lngoto your CloudLab username.- Be careful of capitalization in your CloudLab username. It has to match exactly.
- Change the IP address to the correct IP address of your head node.
Dockerfile: The Docker image that will package the web server.deployment.ymlandservice.yml: K8 configuration files.
10. Setup the Jenkins pipeline
- Login to the Jenkins server.
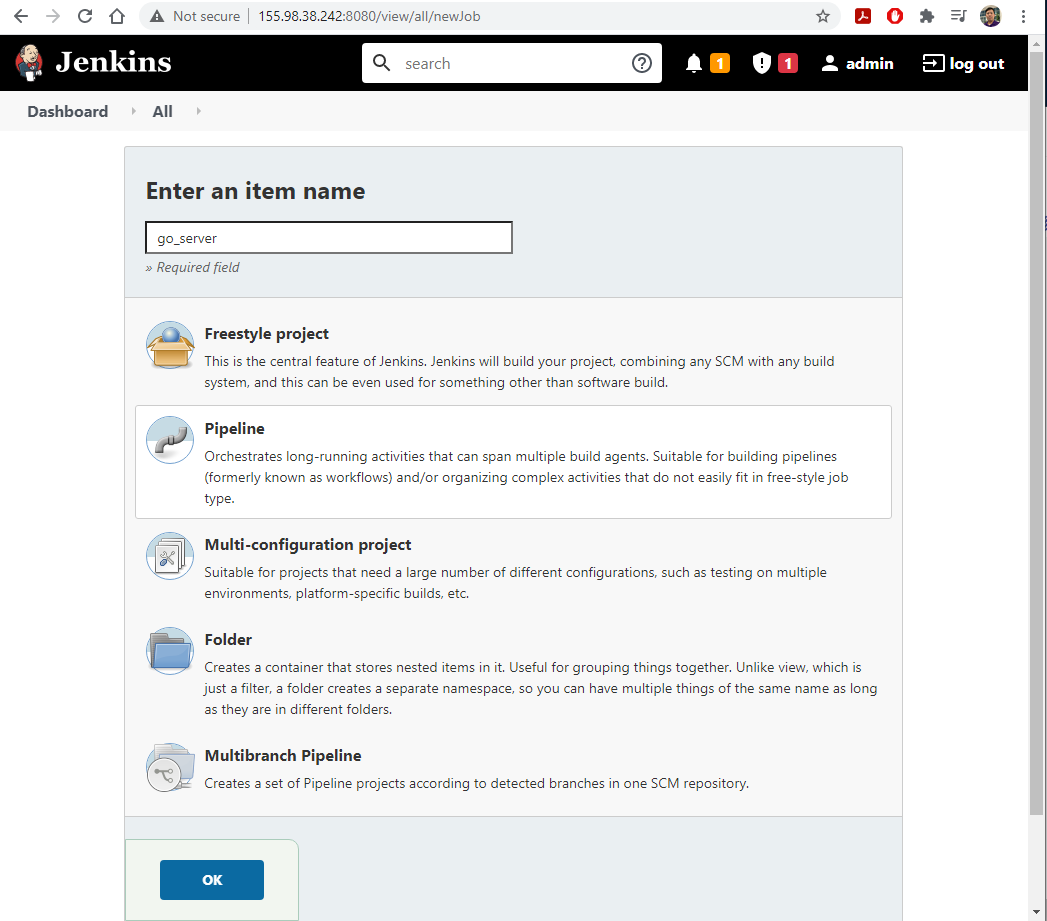
- Select
New Item, and create a newPipelinenamedgo_server.
- On
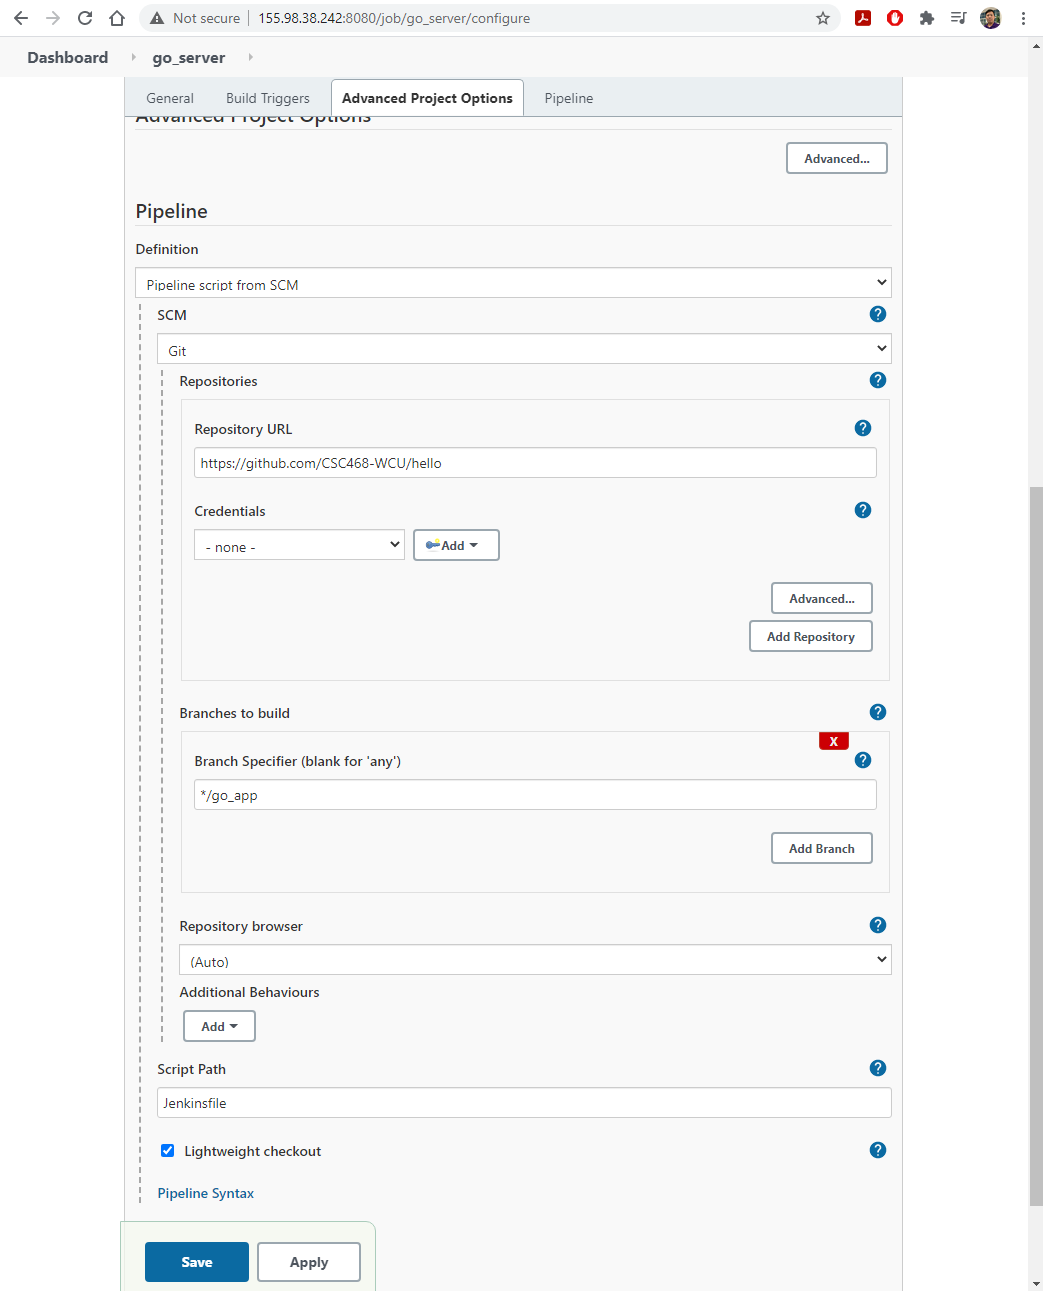
Build Triggerstab, selectGitHub hook trigger for GITScm polling,- On
Pipelinetab, select the followings:
Definition: Pipeline script from SCM (this will open new options)SCM: GitBranch Specifier:go_app- Click
Save
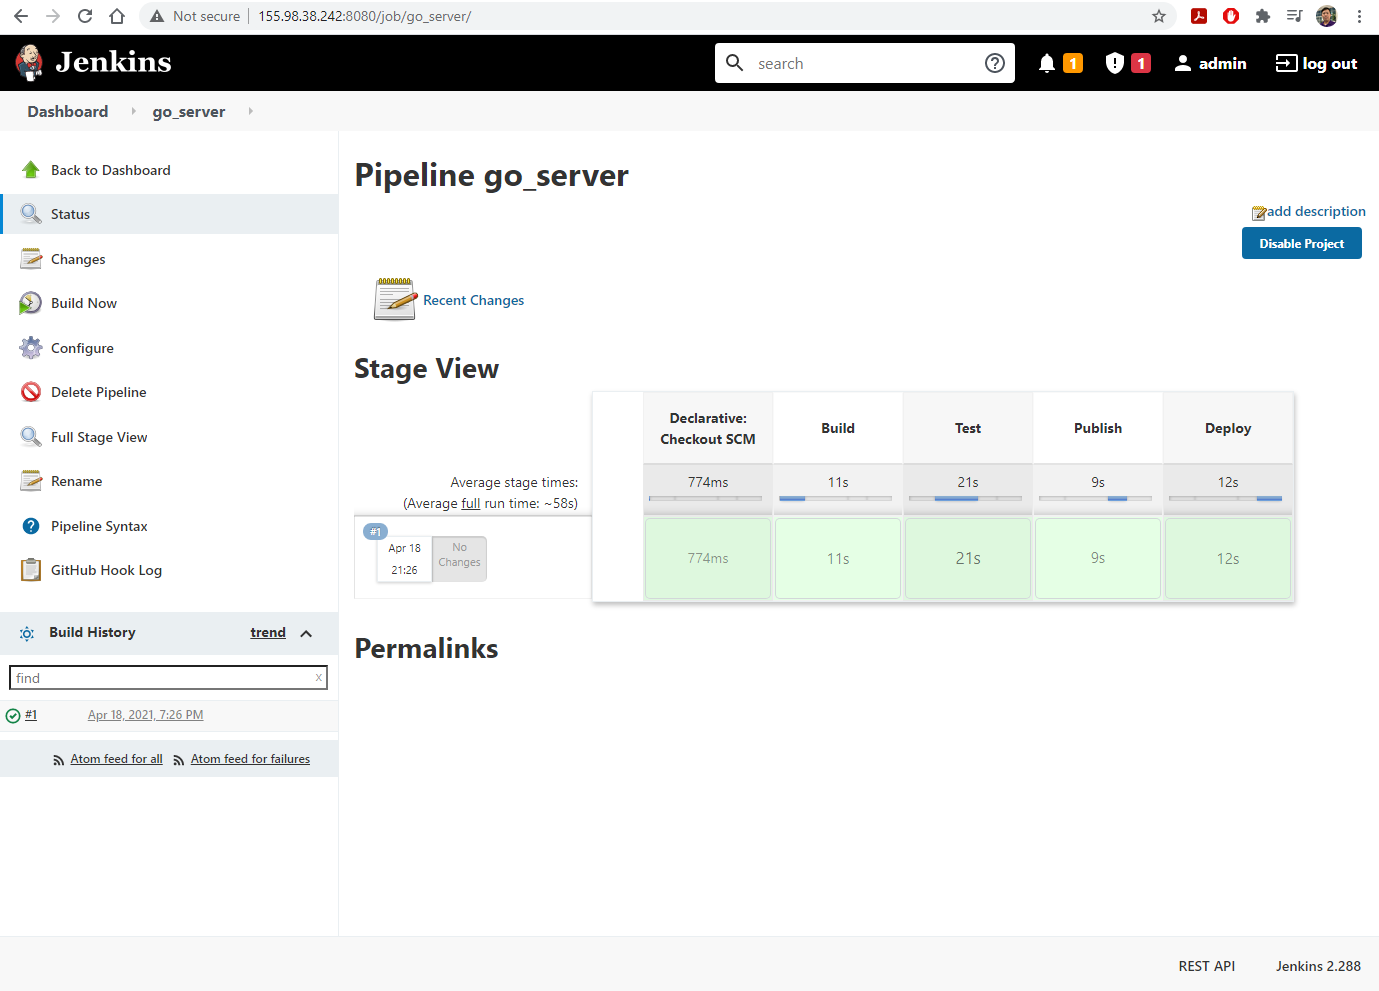
- Click
Build Nowto activate the first build
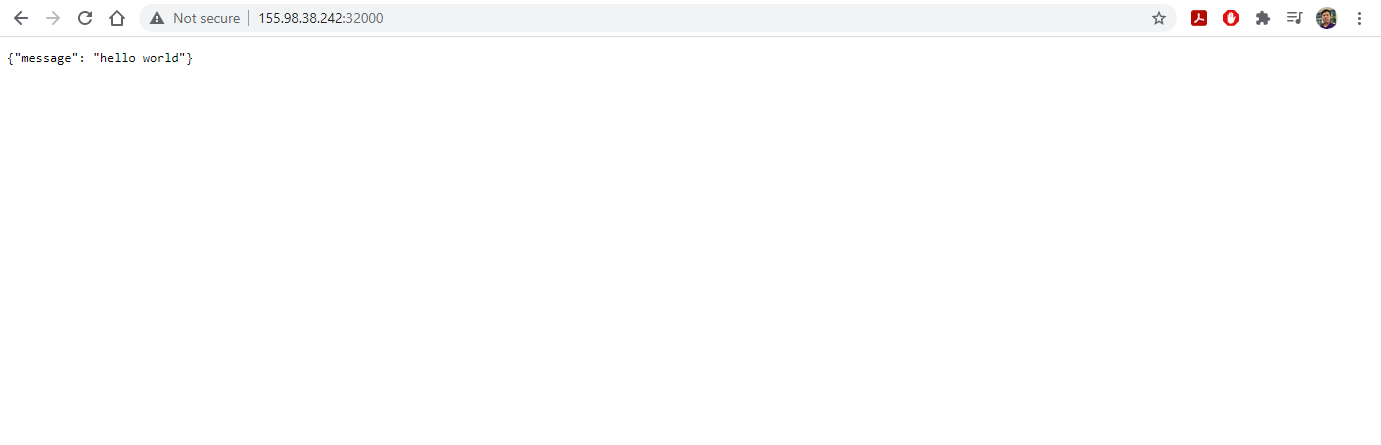
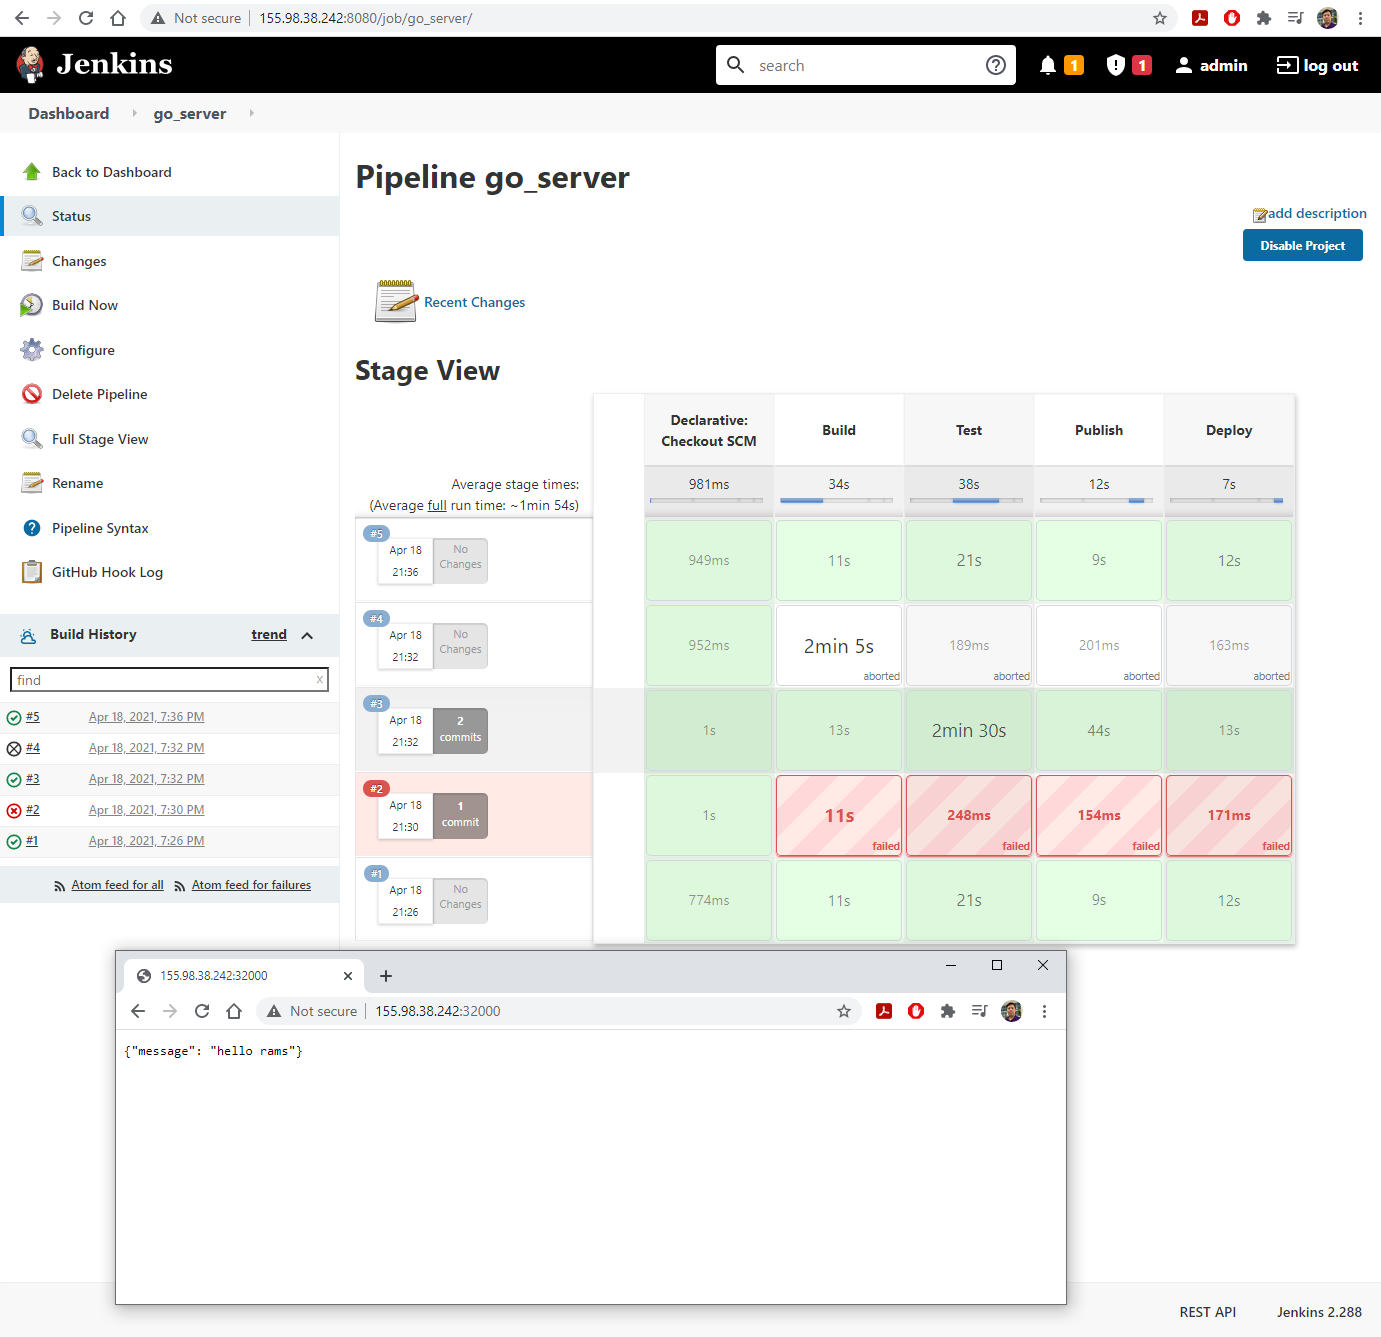
- Open a new browser tab and visit the IP address of
headat port 32000 to see the running server
11. CI/CD
- Edit
main.goingo_appto introduce and error.- Observe that the build failed, but the web server is still running.
- Change
main.goand alsomain_test.goso that the build and test can pass.- Observe the webserver updated after the build completes successfully.
Key Points